Apple Back Content Examples
This article contains several examples of how to add different types of information to the back content of your Apple Store Card or Apple Coupon.
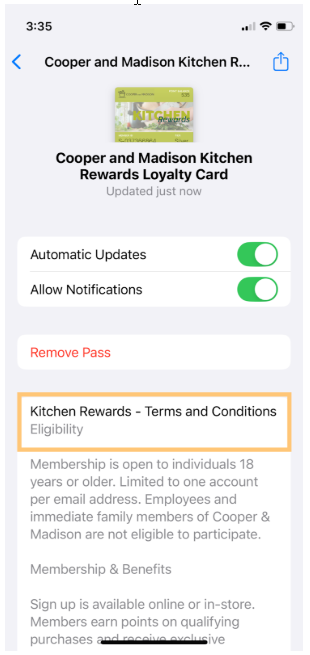
Example: Terms and Conditions
In the below example, the user has added their Terms and Conditions to the back content of their Wallet Pass. They added a new section of type Fixed Text, entered a descriptive Header, and entered the text into the Template field.
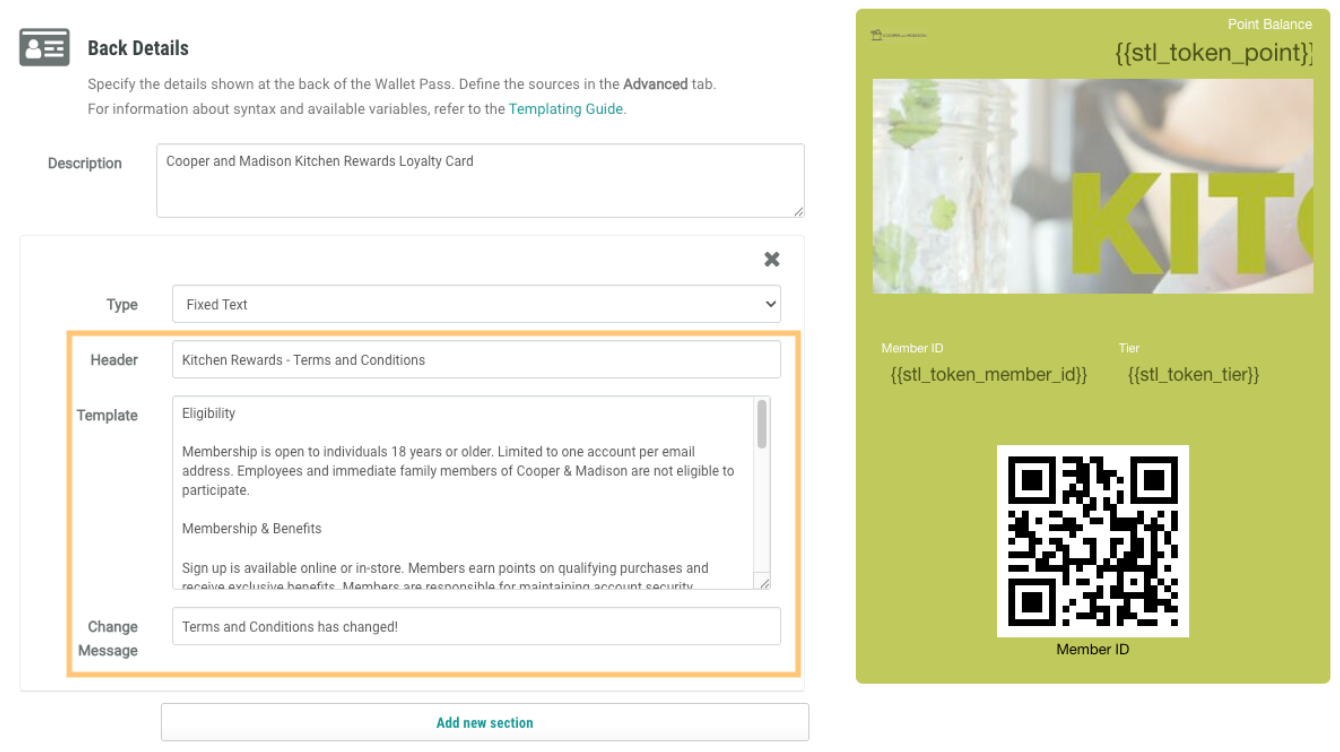
The terms and conditions will appear to the Member on their device as follows:
Example: Links
In this example, the user wants to add links to the back content of their Wallet Pass to help Members access important resources, such as their Brand Website and Reward Site. These links can be added through two different methods.
In the first method of adding links, the user has added a new section of type Fixed Text, entered a descriptive Header, and entered a simple link URL into the Template field. This method creates a basic, functional link.
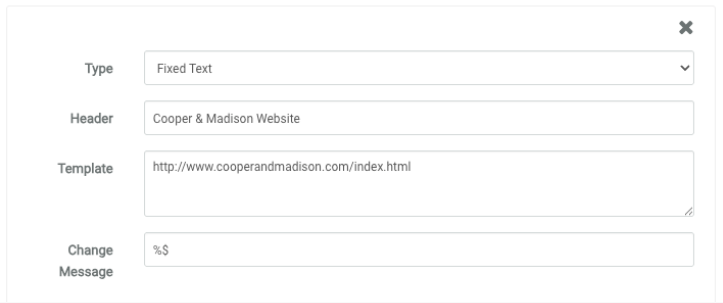
The simple link will appear to the Member on their device as follows:
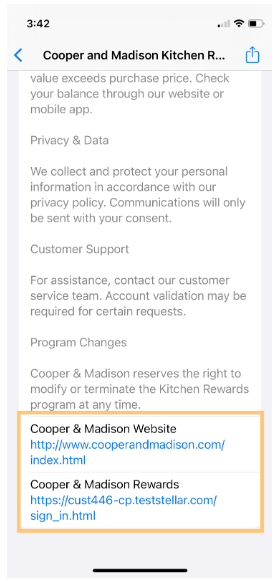
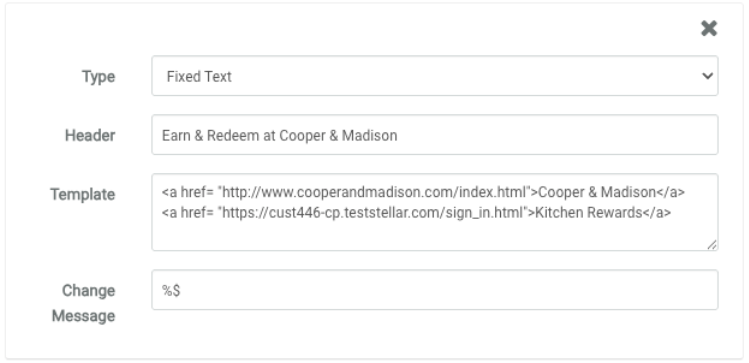
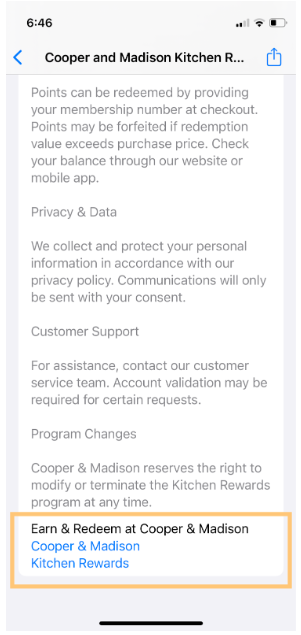
The second method of adding links gives you more control over how the links appear on the device. To create more professional-looking links, use HTML formatting within the Template field. In the below example, the user has added a new section of type Fixed Text, entered a descriptive Header, and entered HTML-formatted links into the Template field.
The formatted links will appear to the Member on their device as follows:
Example: Issued Offers
Note: This example is applicable only to Apple Store Cards, not Apple Coupons.
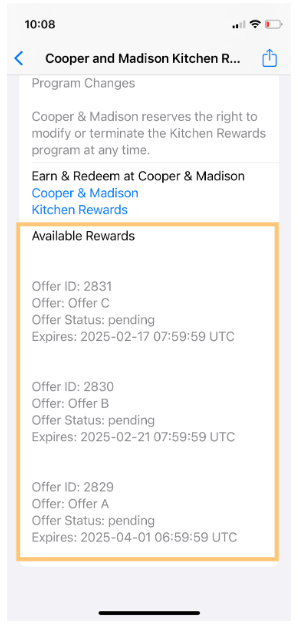
In this example, the user wants to display personalized Offers to Members using Liquid templating. The back content will display pending Offers sorted by expiration date, so Members will see their most relevant and time-sensitive Offers first.
Before setting up the back content on the Wallet Pass, you must first:
-
Configure a Content Source that will provide your Offer data.
-
Add this Content Source to the Wallet Pass as a Data Source. See Configure Store Card / Loyalty Pass Advanced Options for more information.
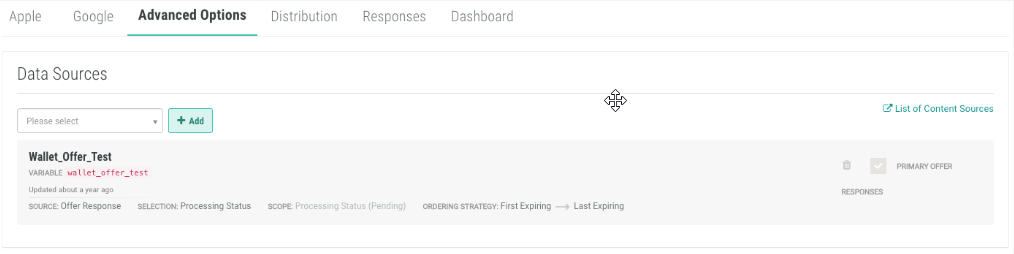
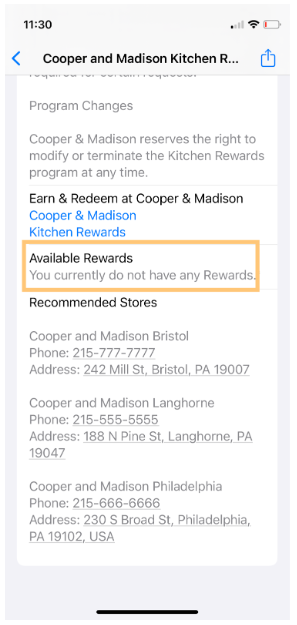
Once the above steps are complete, you can configure the back content of your Wallet Pass. In the below example, the user has added a new section of type Custom, then selected the Content Source they added above. They also entered a descriptive Header, and entered the appropriate Liquid templating into the Template field. Liquid templating allows you to show important Offer details, such as status and expiration dates. The below example also includes a message for Members who don't have any current Offers.
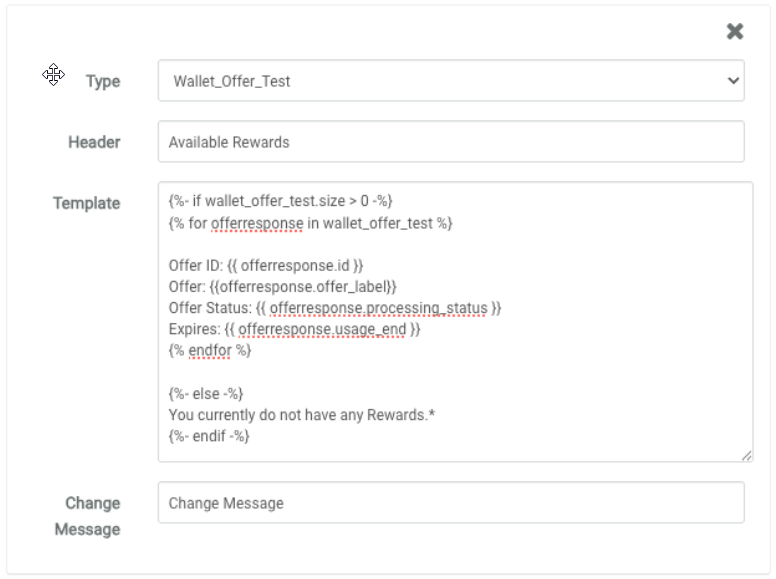
This example Liquid templating code is provided below:
{%- if wallet_offer_test.size > 0 -%}
{% for offerresponse in wallet_offer_test %}
Offer ID: {{ offerresponse.id }}
Offer: {{offerresponse.offer_label}}
Offer Status: {{ offerresponse.processing_status }}
Expires: {{ offerresponse.usage_end }}
{% endfor %}
{%- else -%}
You currently do not have any Rewards.*
{%- endif -%}
The Offer details will appear to the Member on their device as follows:
|
With available Offers: |
Without available Offers: |
|
|
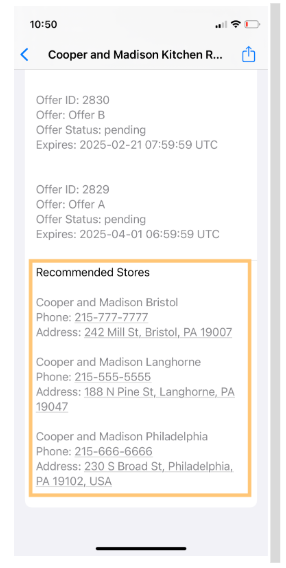
Example: Store Locations
In this example, the user wants to display store locations using Liquid templating. The back content will display store locations, so Members can use the Wallet Pass to find their nearest store.
Before setting up the back content on the Wallet Pass, you must first:
-
Define and publish your store locations within the Loyalty platform as Places; see Getting Started with Places for more information.
-
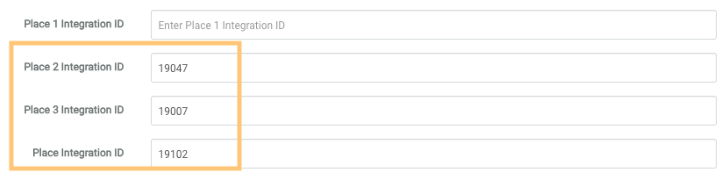
Ensure that Members have at least one Place Integration ID as a Member Attribute within their Member Profile. For more information on Place Integration IDs, see the Wallet Pass iOS Geofencing Guide.
Once the above steps are complete, you can configure the back content of your Wallet Pass. In the below example, the user has added a new section of type Stores / Locations. They also entered a descriptive Header and a friendly update notification message in the Change Message field, and entered the appropriate Liquid templating into the Template field. Liquid templating allows you to show recommended store locations in an easy-to-read format.
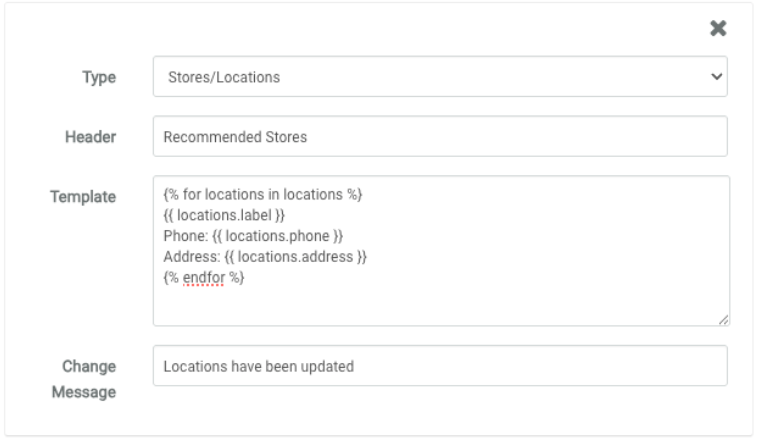
This example Liquid templating code is provided below:
{% for locations in locations %}
{{ locations.label }}
Phone: {{ locations.phone }}
Address: {{ locations.address }}
{% endfor %}
The store location details will appear to the Member on their device as follows: